Working ScreenShots of Product
Entire working process of Software is explained by using the simple screenshots of product. Follow all the simple instructions as given below:
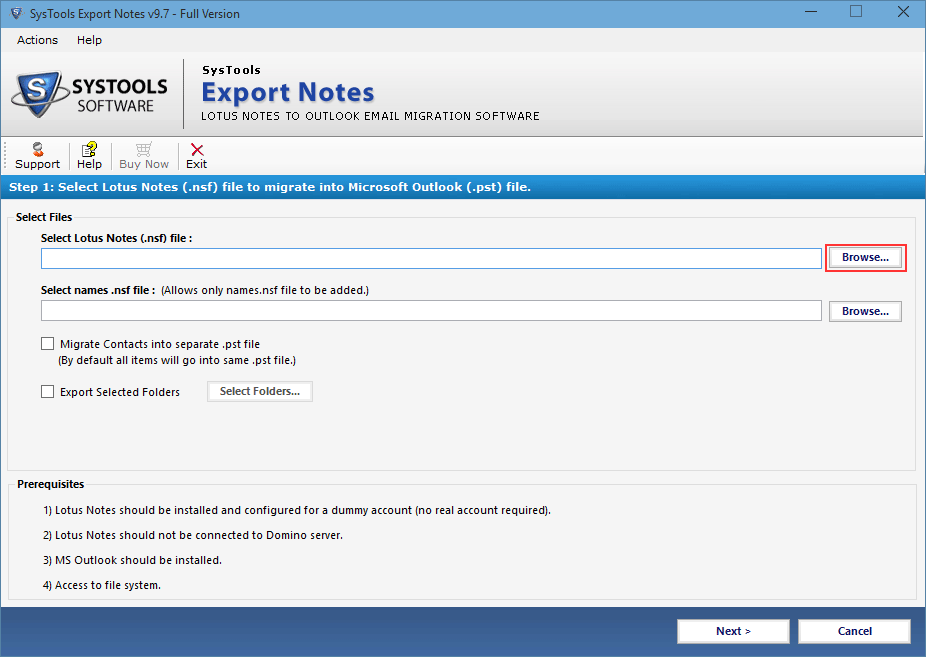
- Screen provides two options to trace individual database.nsf or names.nsf from the system. Select the *.nsf by clicking on browse button.
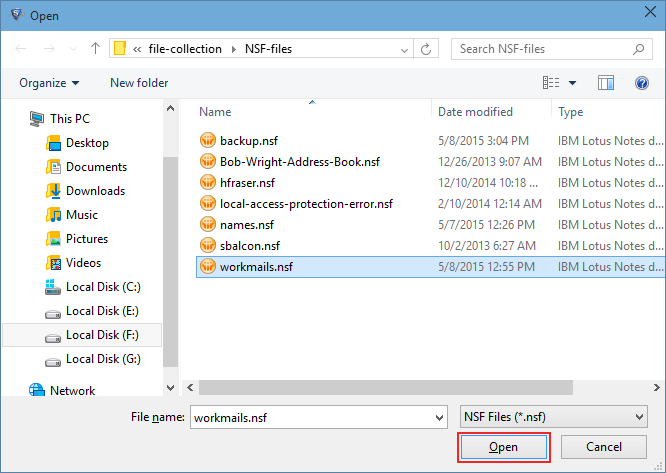
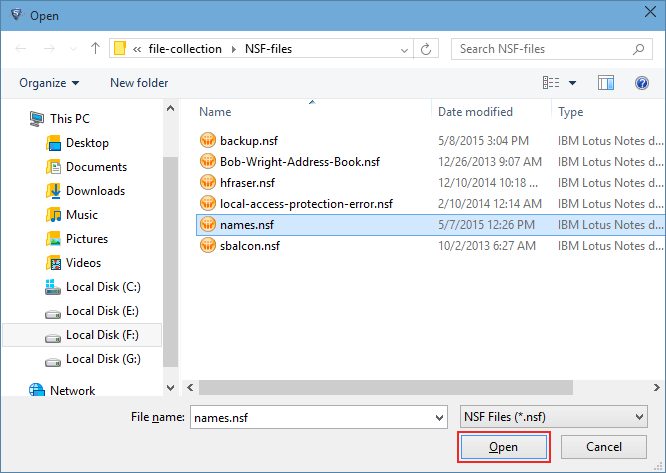
- Choose the appropriate NSF file and click on Open button.
- If you wants to choose names.nsf file then select the contacts file by hitting on browse button next to it.
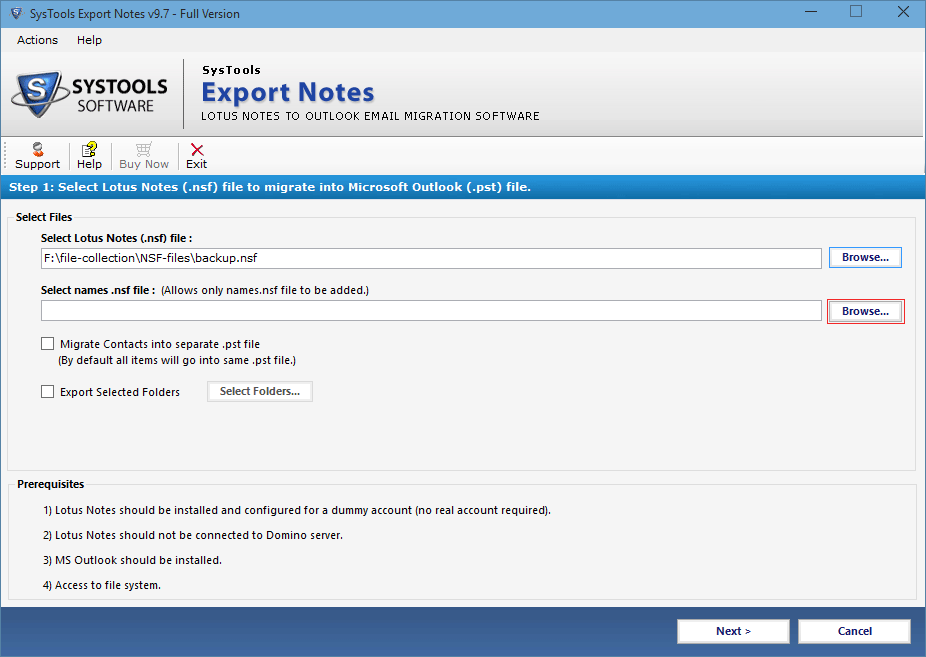
- From the saved location select the names.nsf file and click on Open button.
- If need to save address book separately, checked the option Migrate Contacts into Single PST.
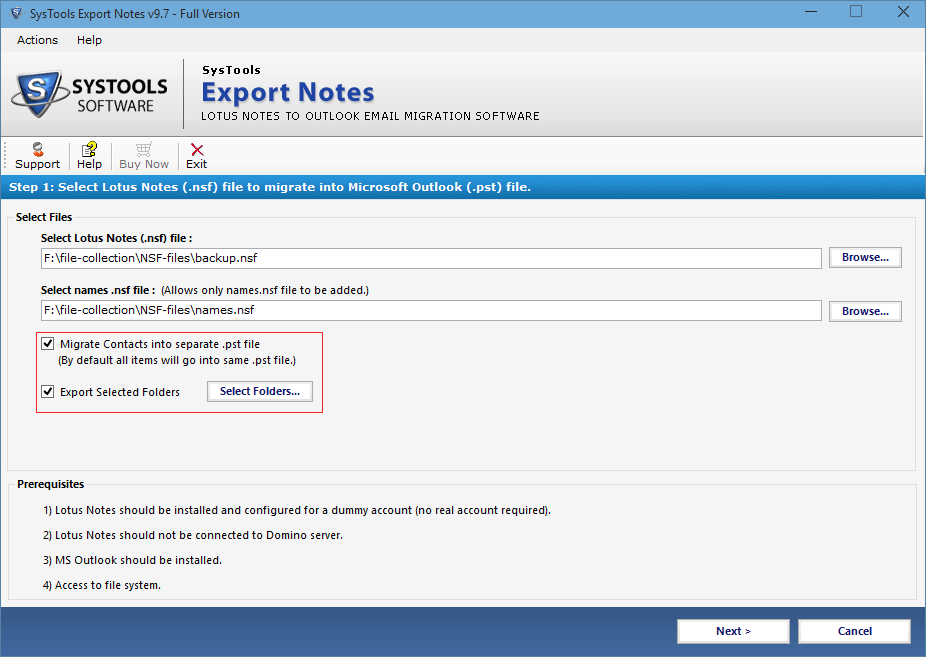
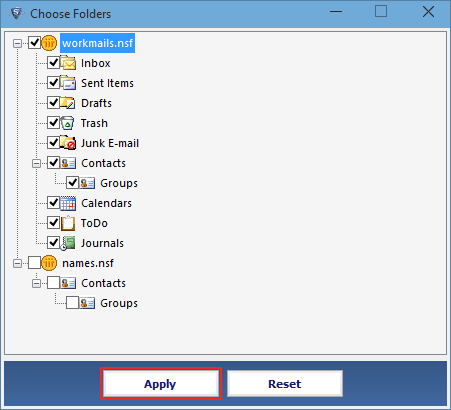
- By clicking on export selected folders option, you can convert by selecting or deselecting the required folder.
- Next steps provides option to select required or all default categories such as Emails, Contacts, Calendars, tasks, Journals for conversion. Check the provided checkboxes in front of each category.

- For specific migration of NSF emails, Calendars, to do list & journals check the specific filter and date range whom to want to include in migration process.

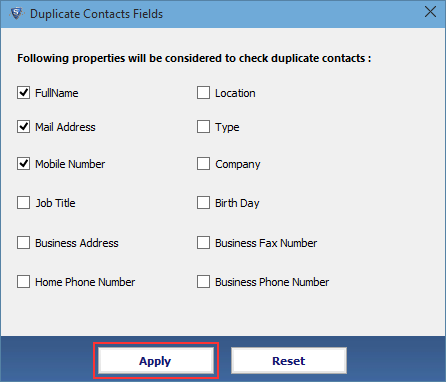
- Check mark the Exclude Duplicate Contacts option to eliminate the replica entry.
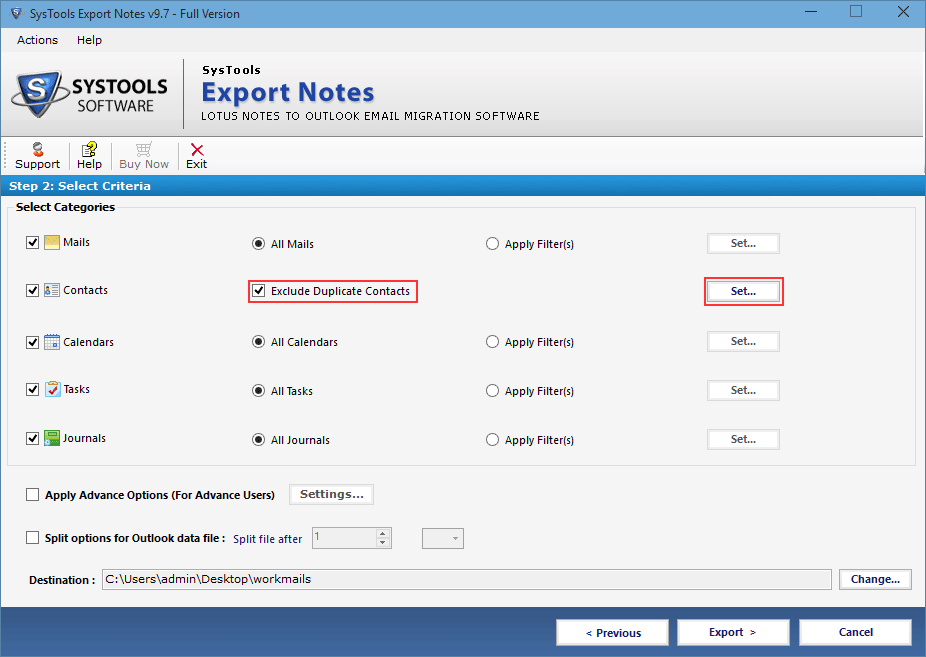
- For filter the duplicate contacts software provides the 12 predefined contacts properties. Filter out the contacts by selecting the category.
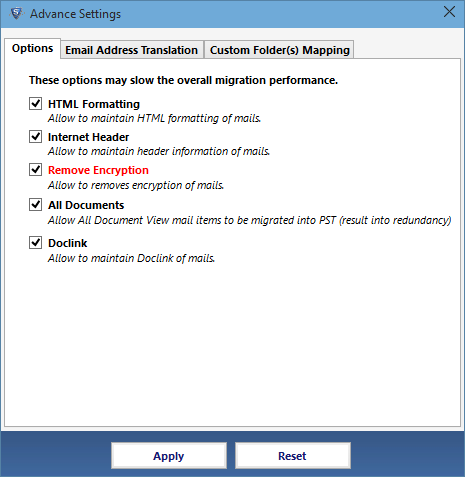
- Also apply the advance setting to preserve the HTML formatting, Internet header and remove encryption. Click on setting button near by the "Apply Advance Options".

- In advance setting first tab options click the required checkbox to save HTML formatting, Internet Header, Remove Encryption, Doclinks and convert All document folder at once.
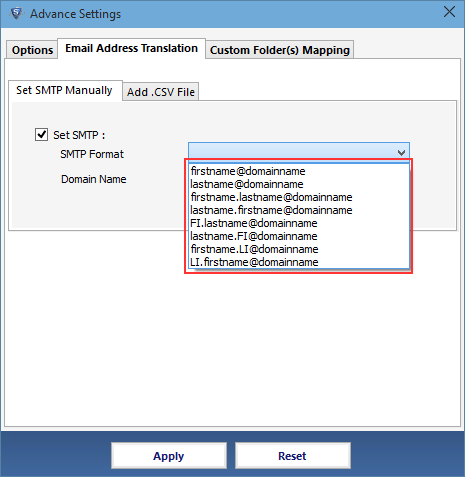
- Next tab of advance setting software allows you to map Lotus Notes Canonical Name into manually set STMP Email ID. For multiple CN values use CSV File.
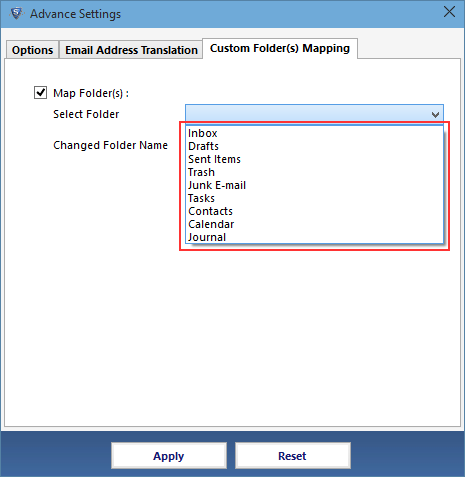
- Software maps the system folders into existing folders or into new folders according to the languages.
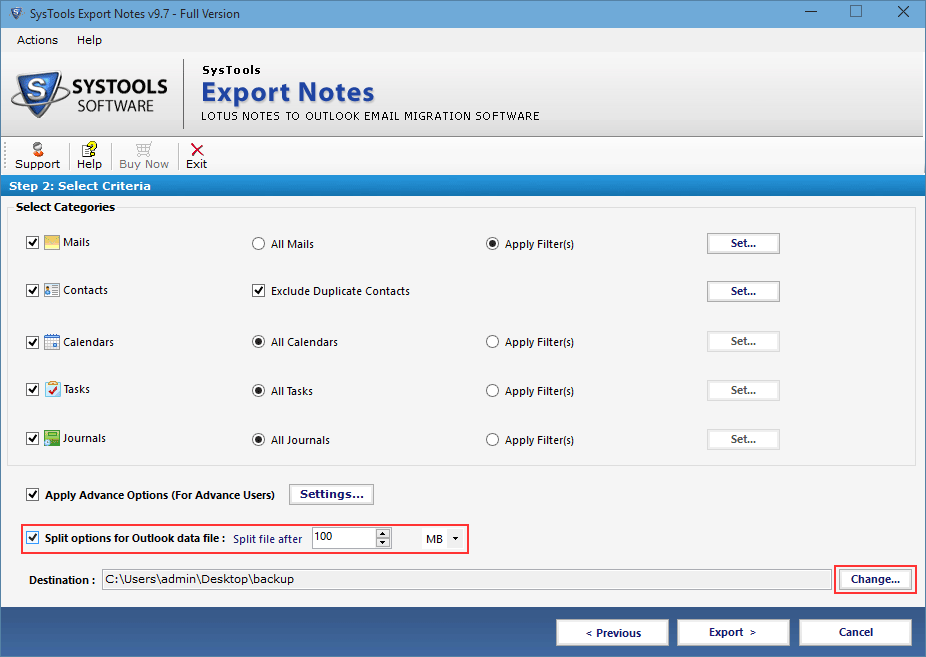
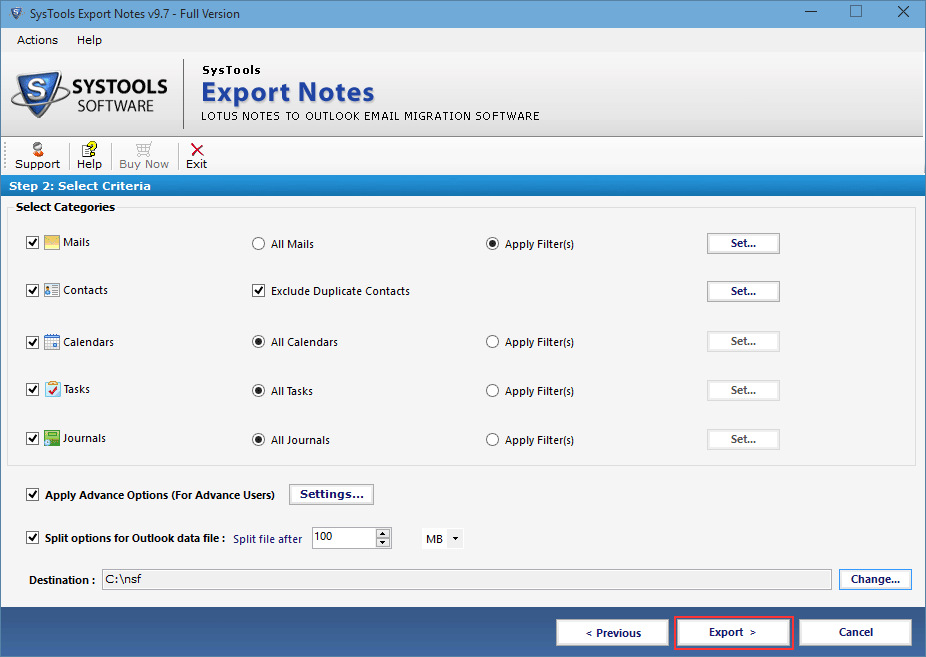
- Split Outlook Data file into smaller size of PST file by choosing this advance option split the PST files with MB and GB size.
- After applying all the advance settings click on Export button to start the conversion process.
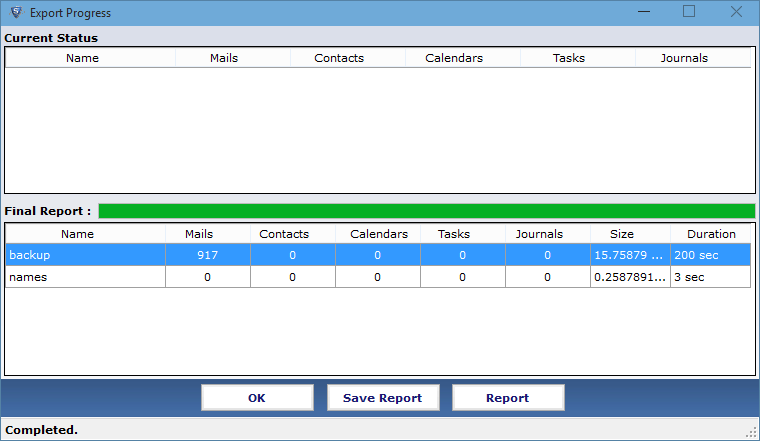
- Software extracts all the data from NSF file and shows the progress report of each element in NSF file. After converting the entire data element to PST it display the successful message of saved PST.