ScreenShots of Software
To know the conversion process in detail view complete Working Process of Software with screenshots.
- Once installation is done, click on browse button to upload the NSF file.
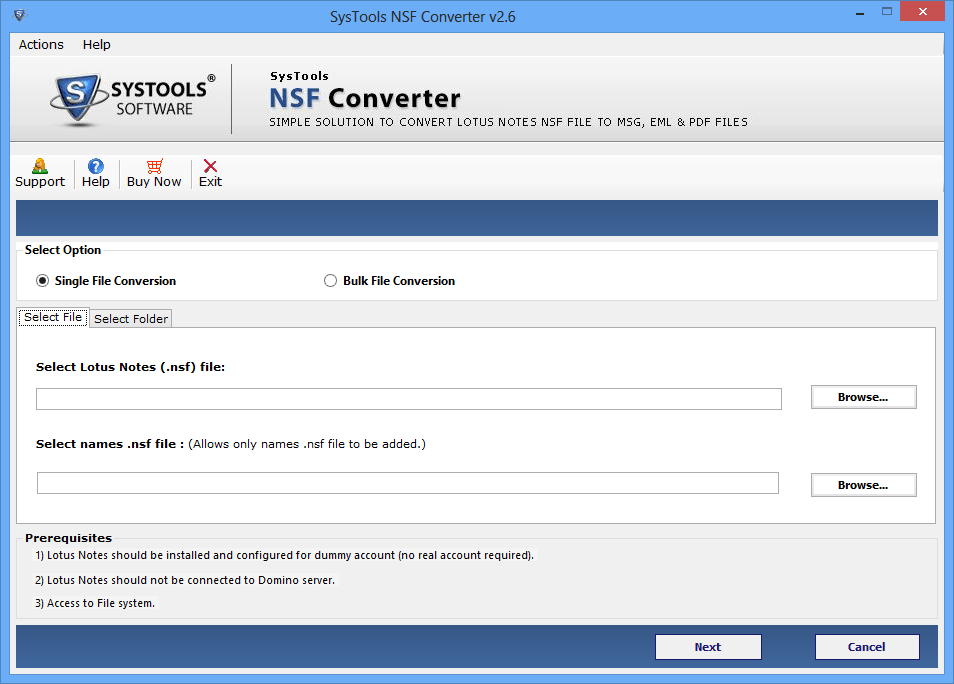
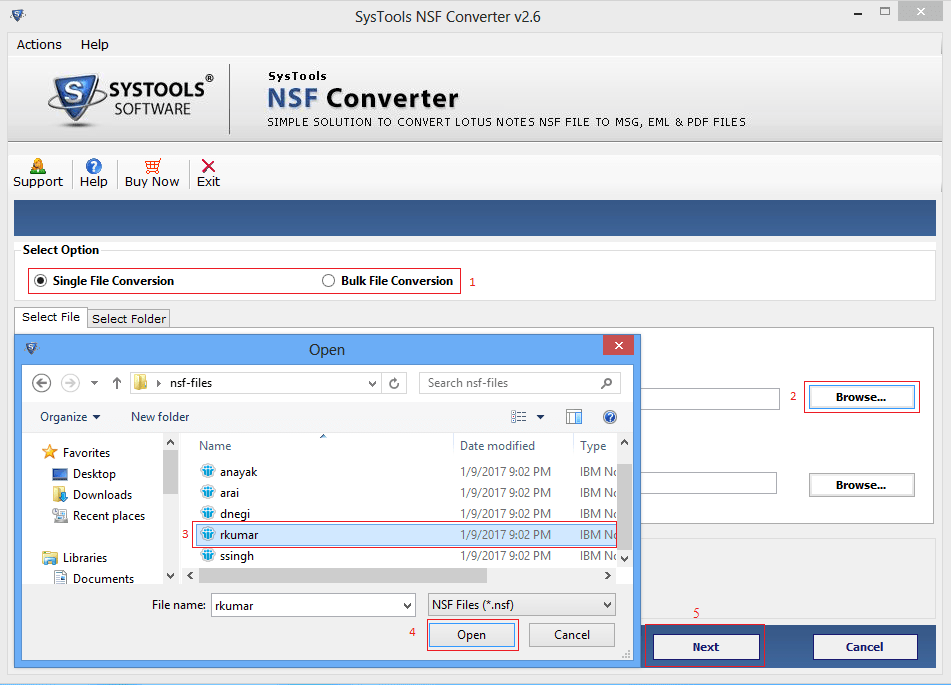
- At the screen given two options provided the first one is single file conversion & second one is bulk file conversion. For Converting single file then you have to choose single NSF file conversion option.
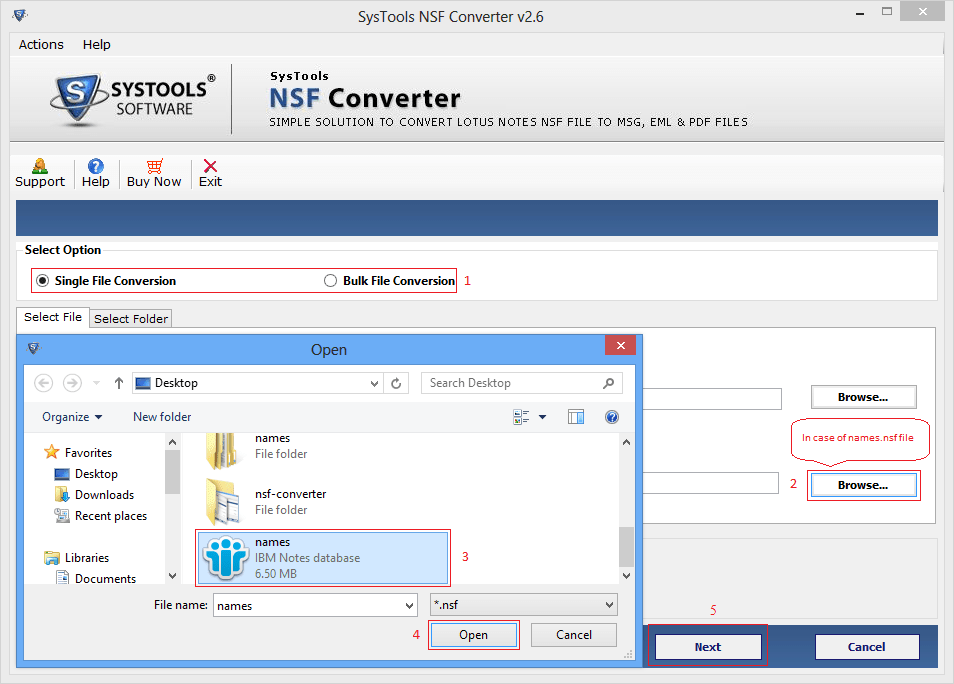
- If you wish for contacts conversion then browse the names.nsf file and click on start the conversion process.
- For Conversion of multiple NSF file then choose Bulk file conversion option.
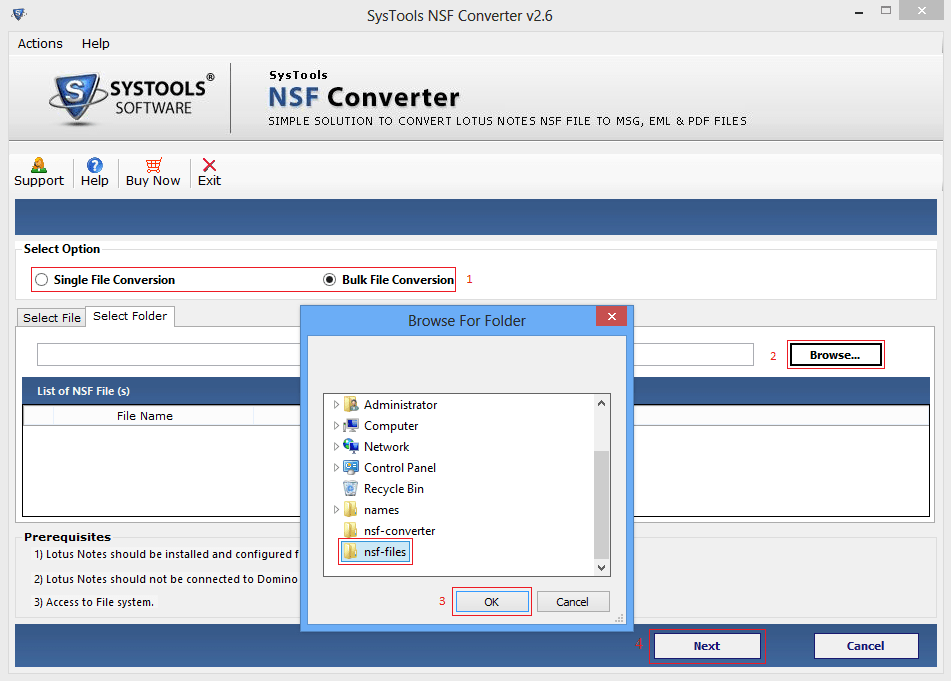
- Now you can see the list of all NSF files then you select folder for export and click on Next button.
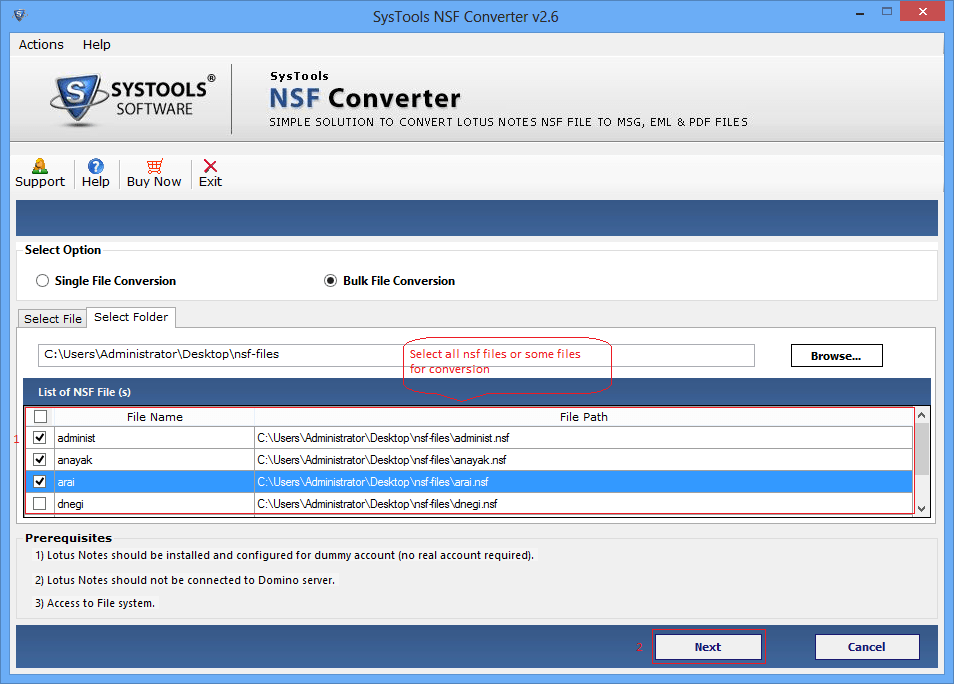
- Next option to select the specific file format EML or MSG or PDF which you want to export for NSF files
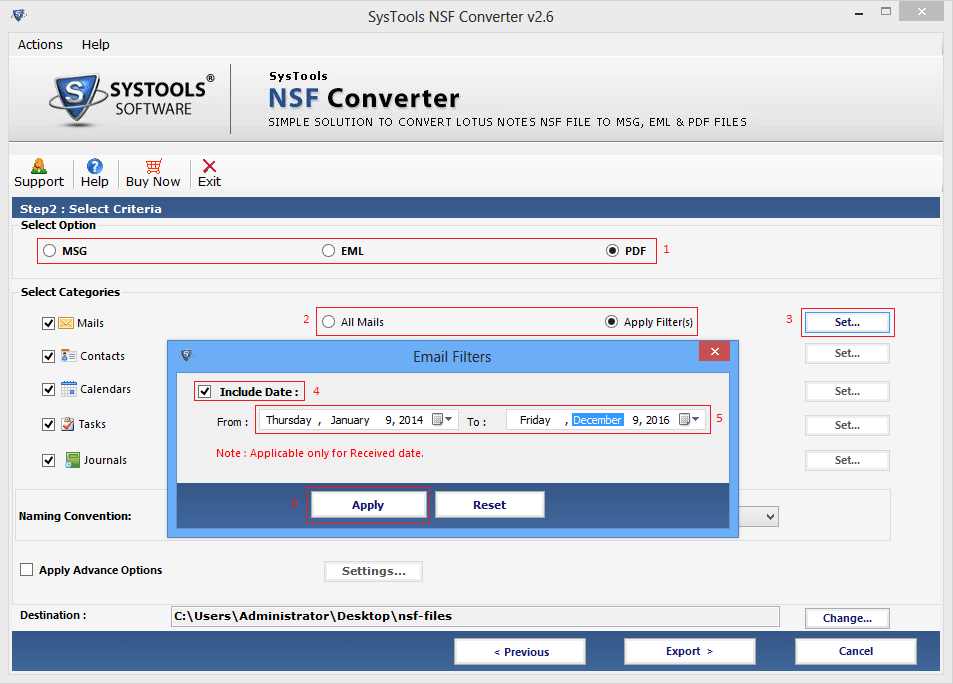
- In mails either you can choose all mails or you can apply the date filter option for exporting selective mails
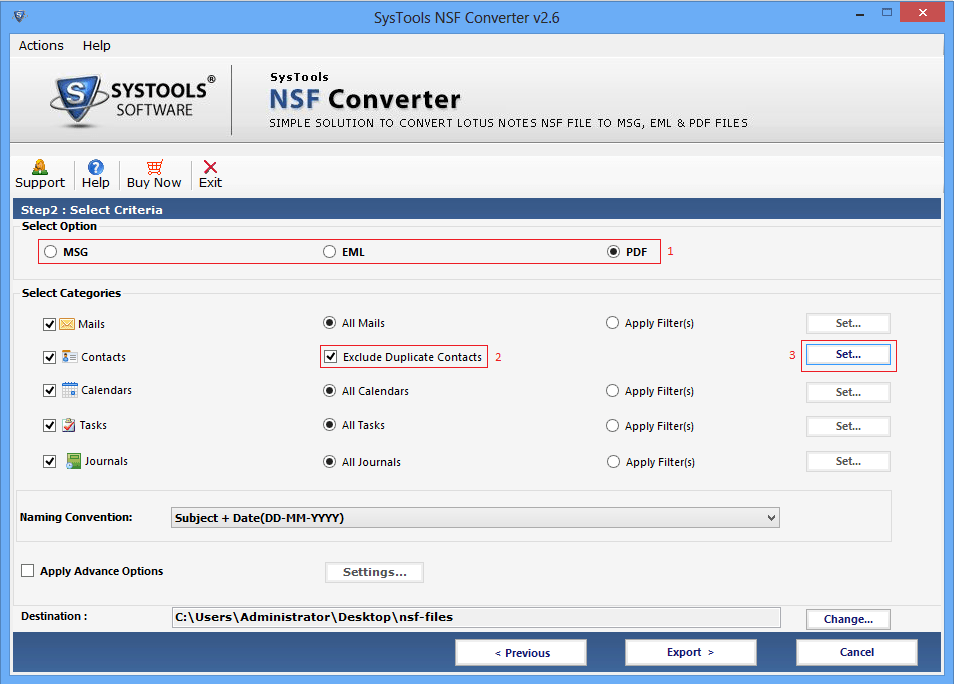
- Now you have to provide the option which is exclude contacts if you choose this option you can easily save the space.
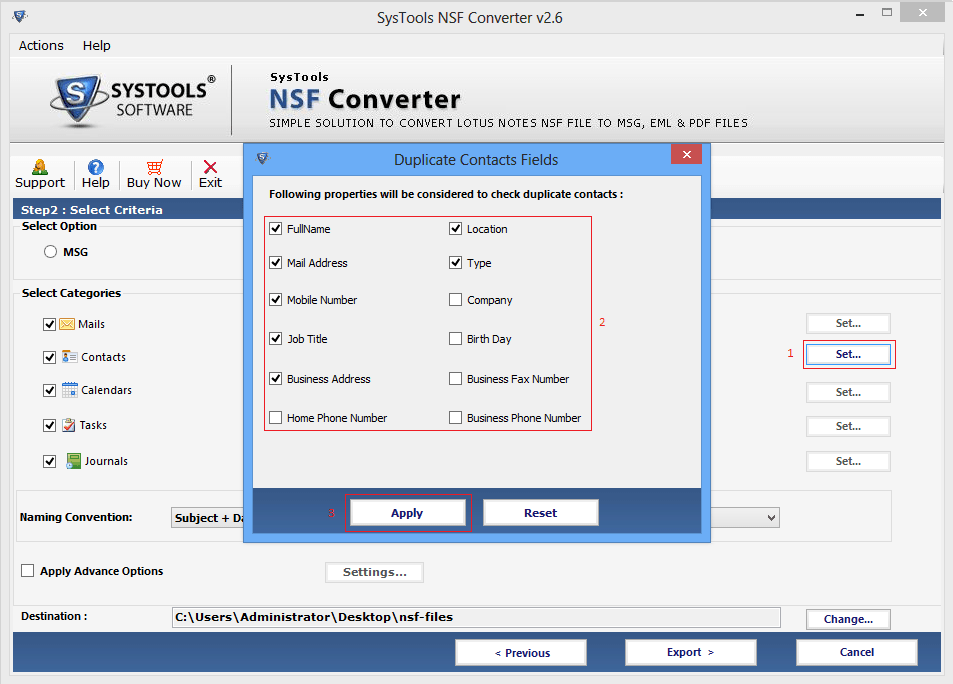
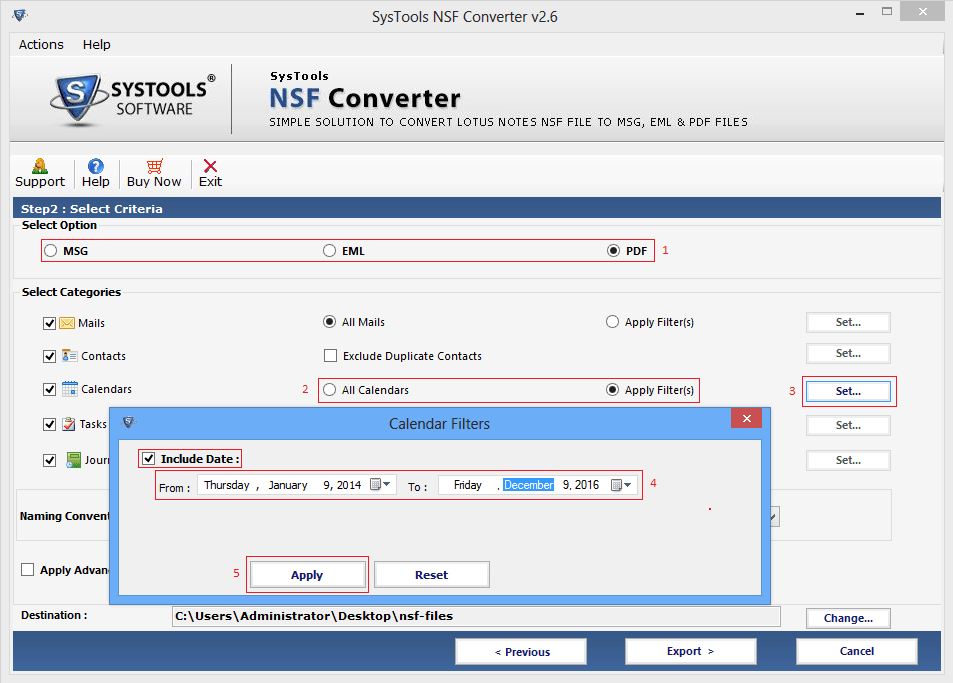
- Apply date filters in date
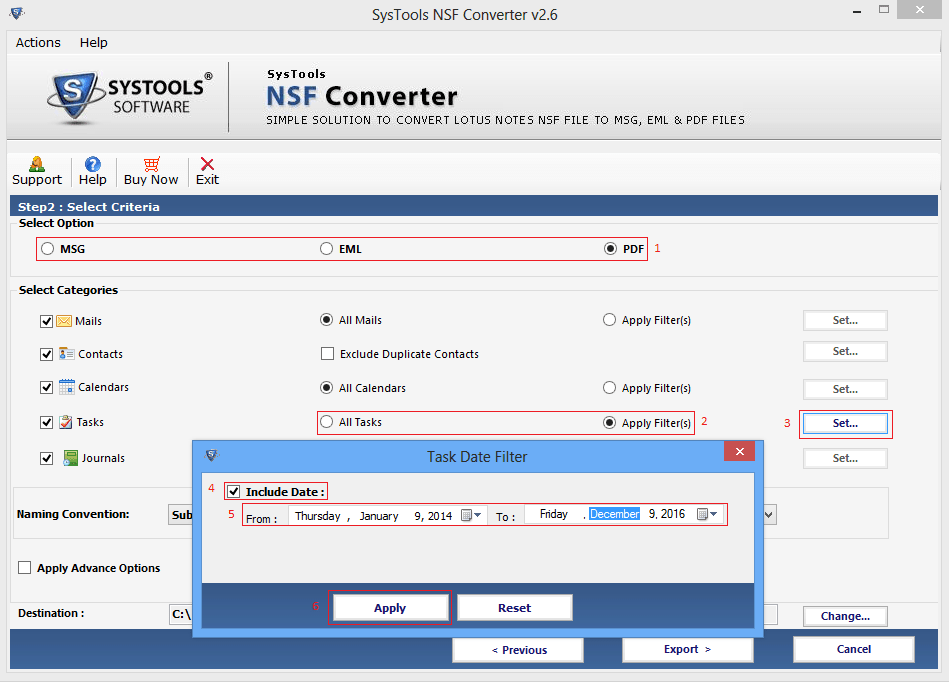
- Apply Task filters in Task
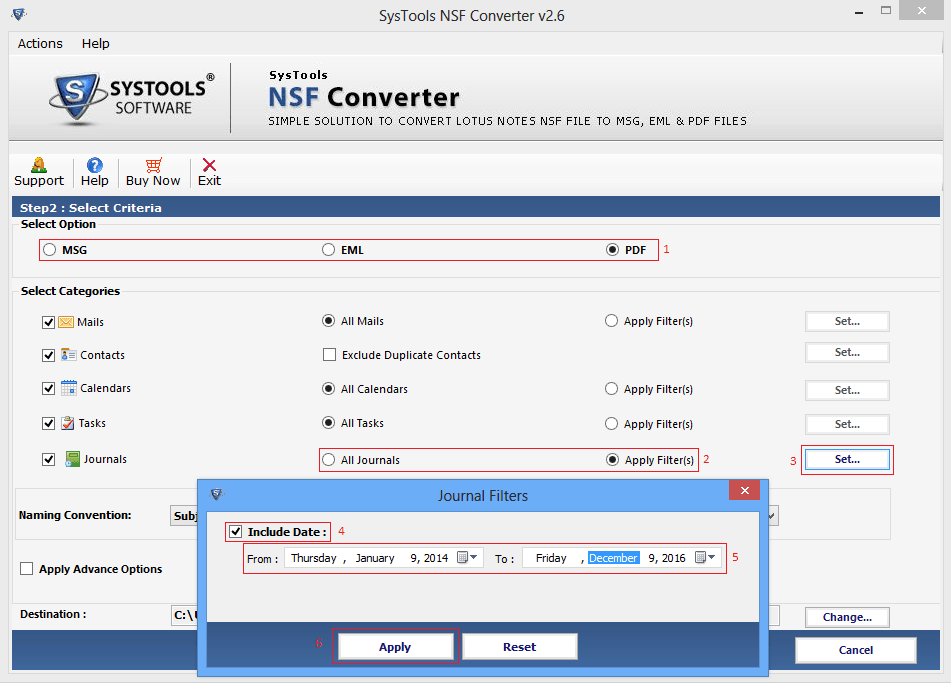
- Apply Journal filters for journals
- Now choose the Naming file convention option and then click on Export.
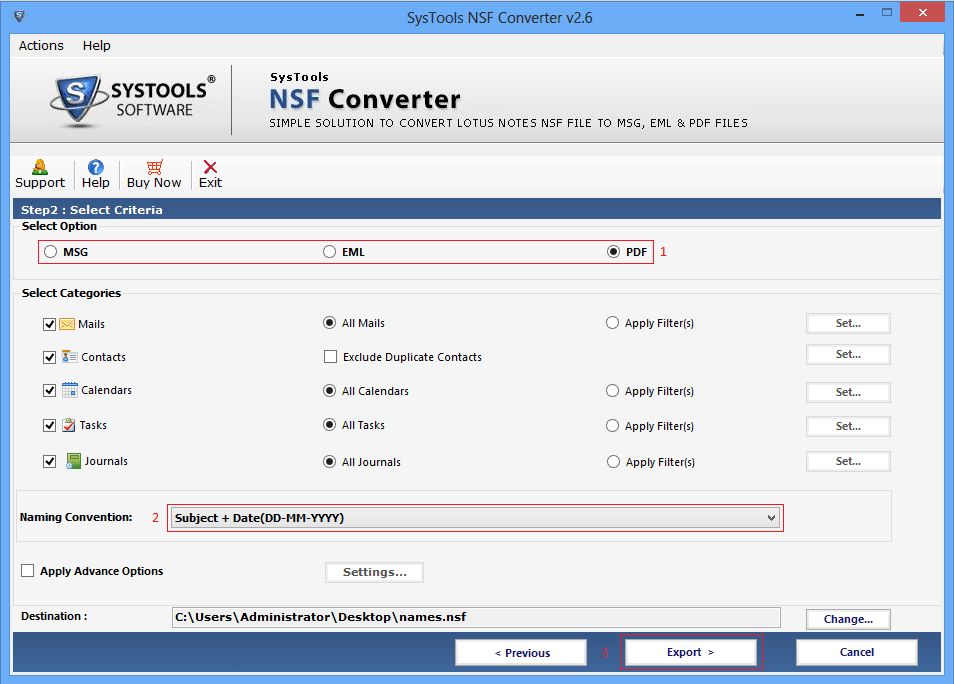
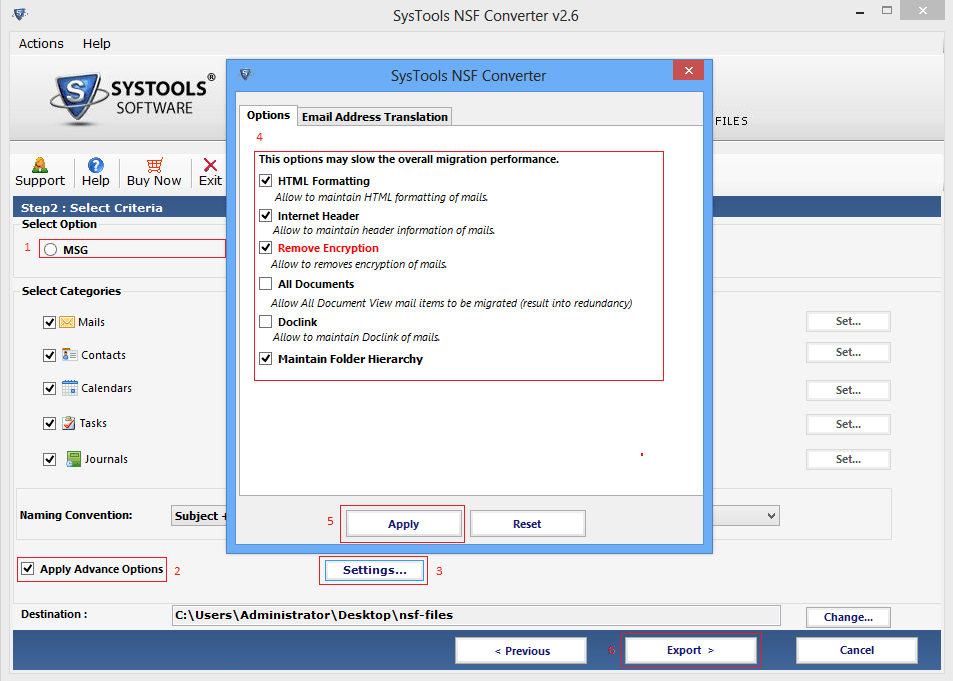
- Now you have to Apply advance options there are you select the options like HTML formatting, internet header, Remove Encryption, Doc link, maintain internet hierarchy etc.
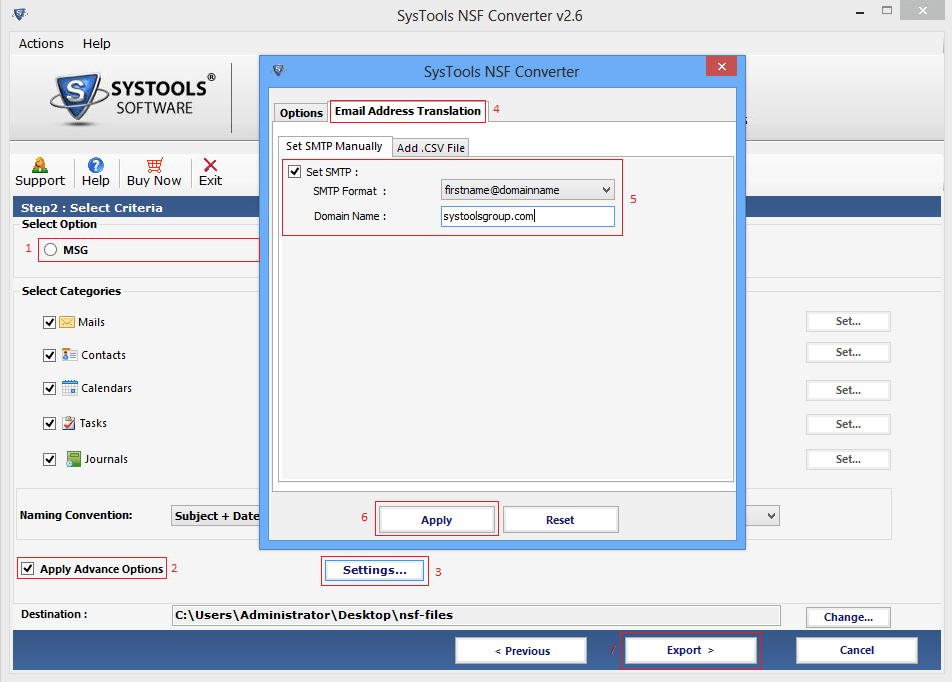
- Go through the email address translation section in Advance setting and set SMTP manually.

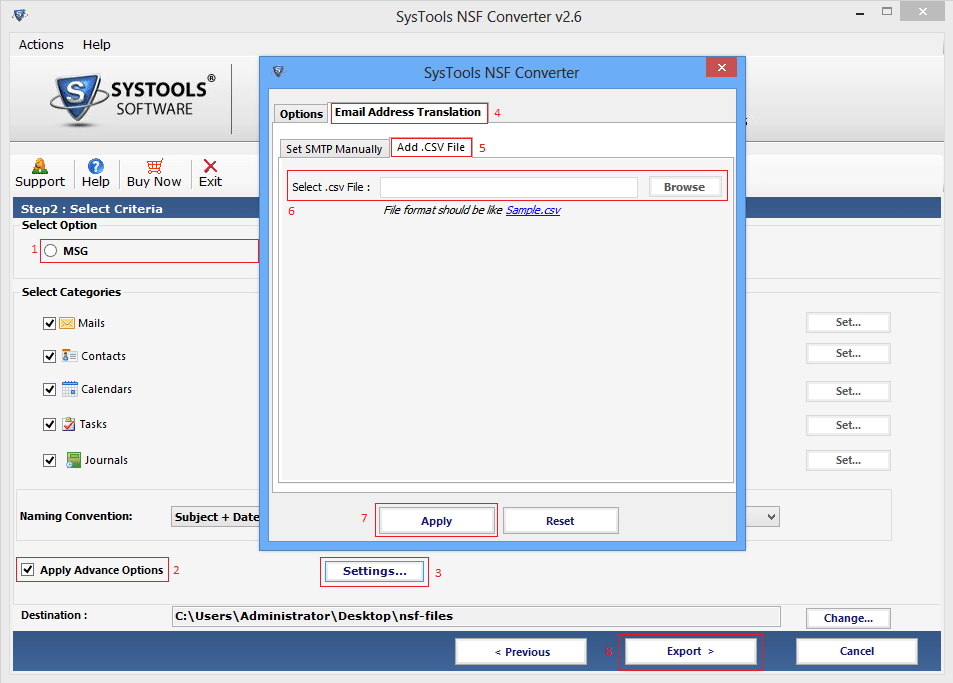
- Next to click on Export button and enter the password
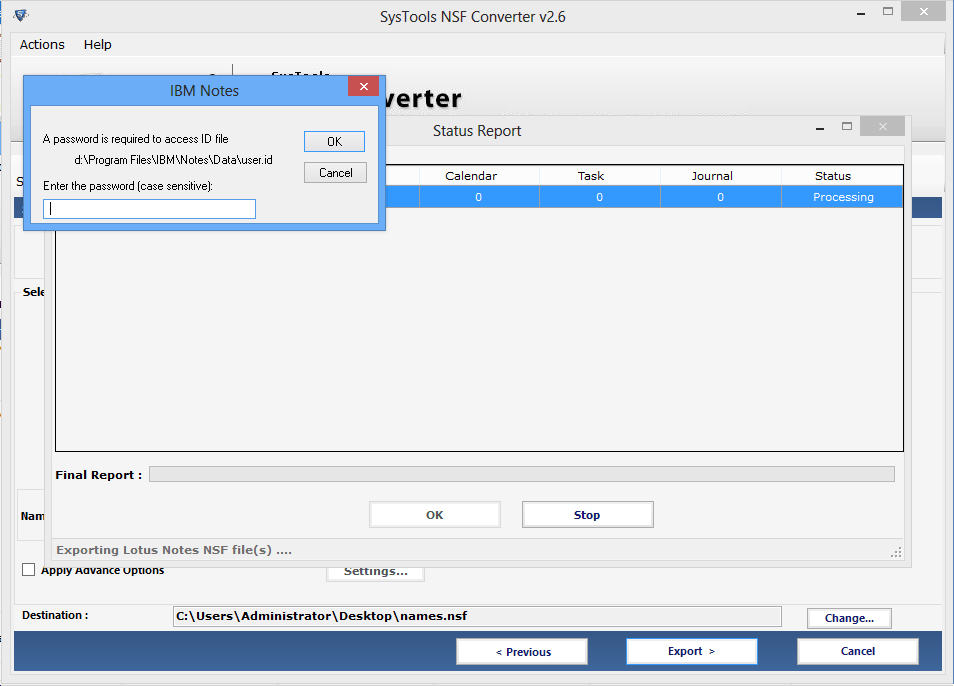
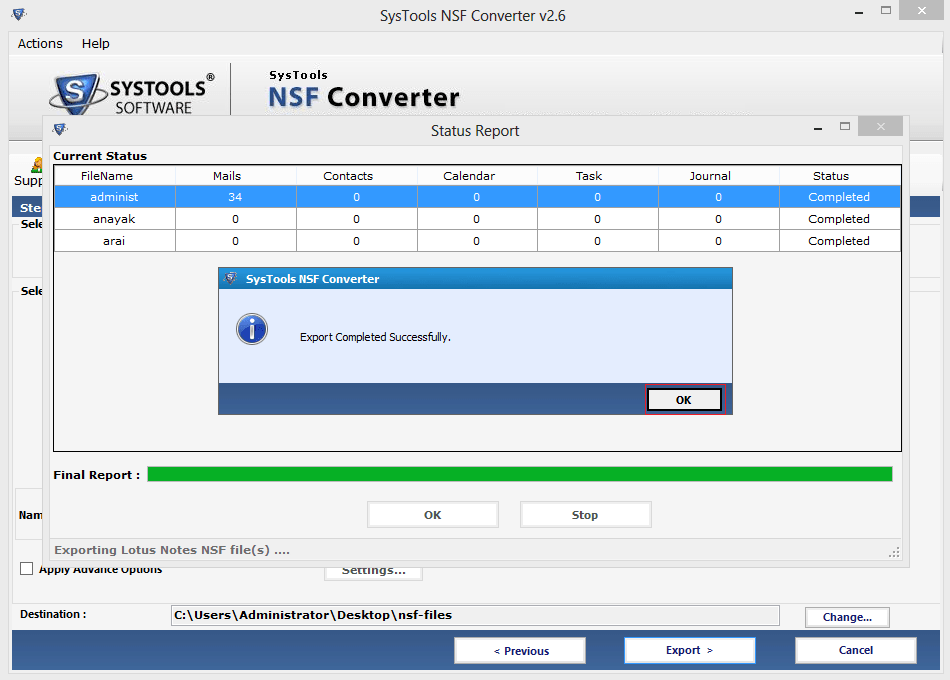
- When you enter the password the status report of conversion will be generated
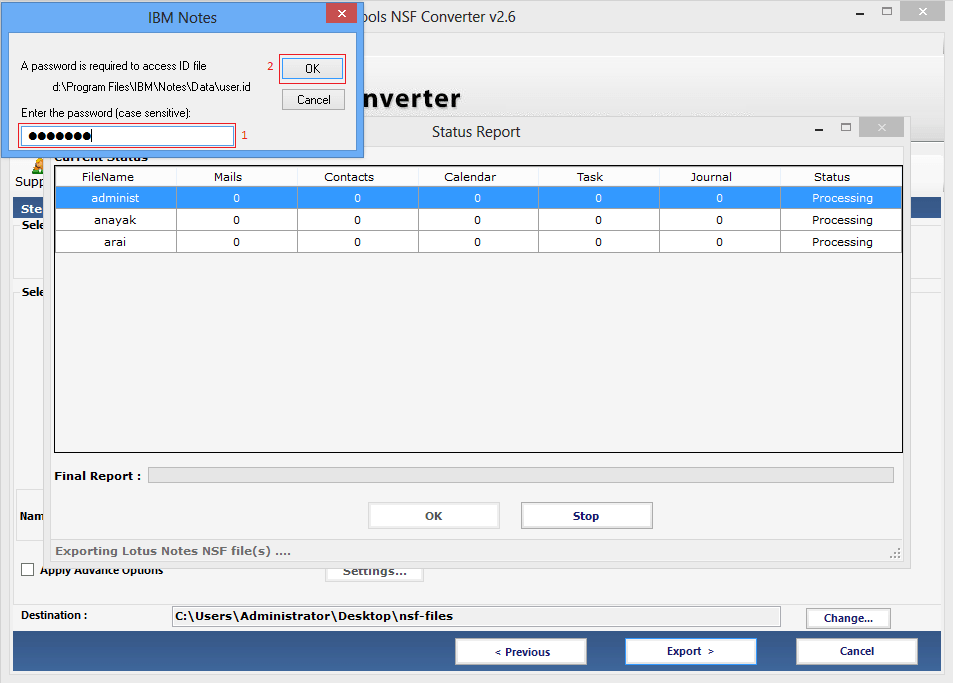
- This status report will show the current and previous status of the conversion
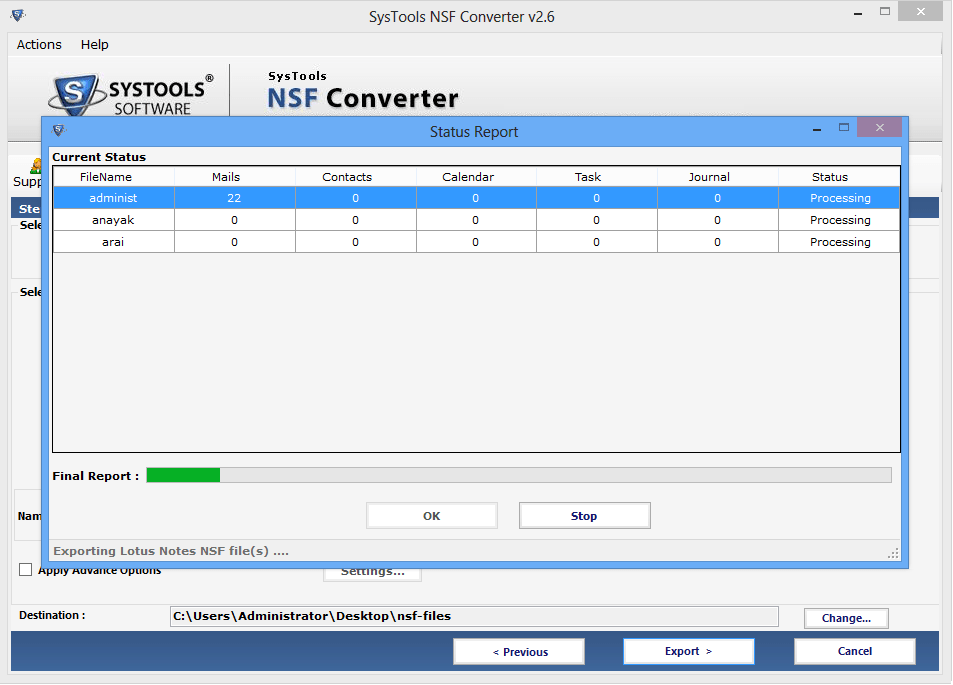
- Now Conversion process done successfully.
