Working Steps of Software
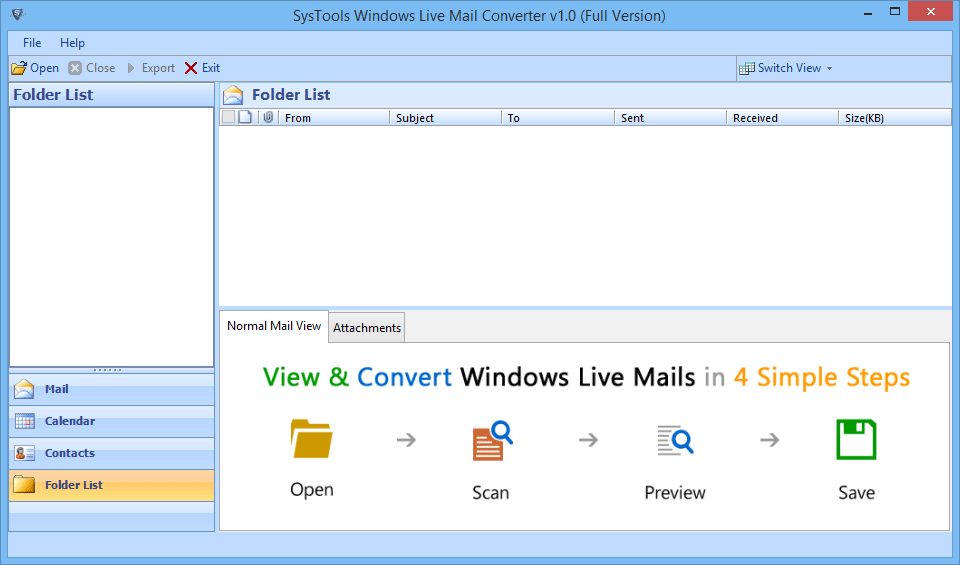
- Install the Software and then Run the Program, first screenshot of Software will be displays like mention below.
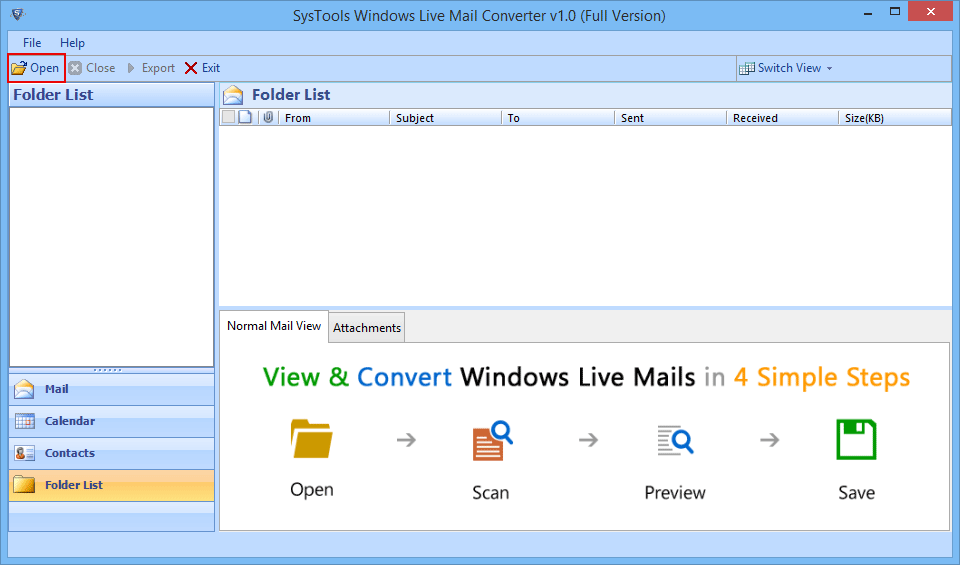
- Click on Open Button to add the WLM files from system.
- Now window of “Select Path†will be pop up in which user can choose the option of Auto Detect Storage Location so that program will detect all the Windows Live Mail files by its own.
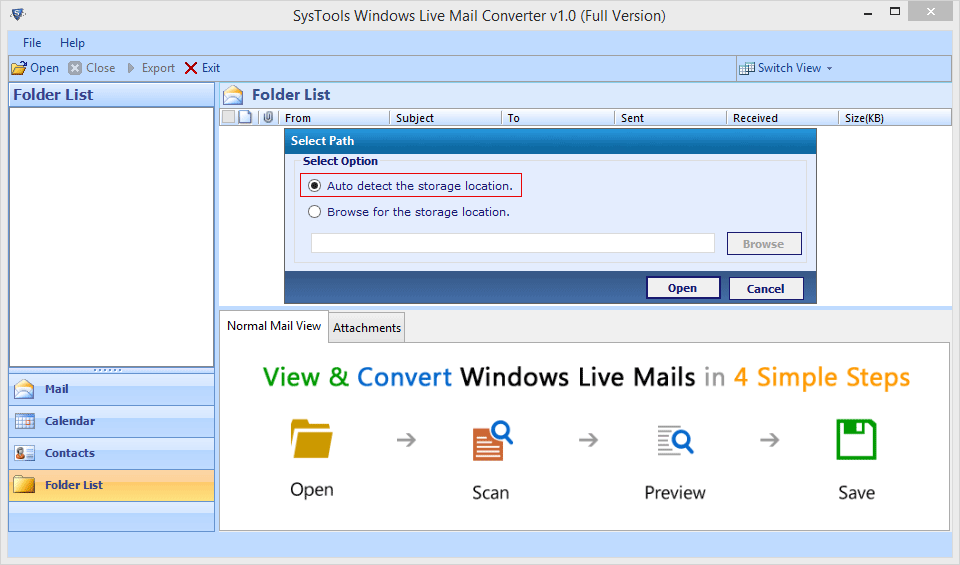
- If you want to choose the file from your own side then choose another option i.e. Browse for Storage Location and then click on Browse button to proceed further.
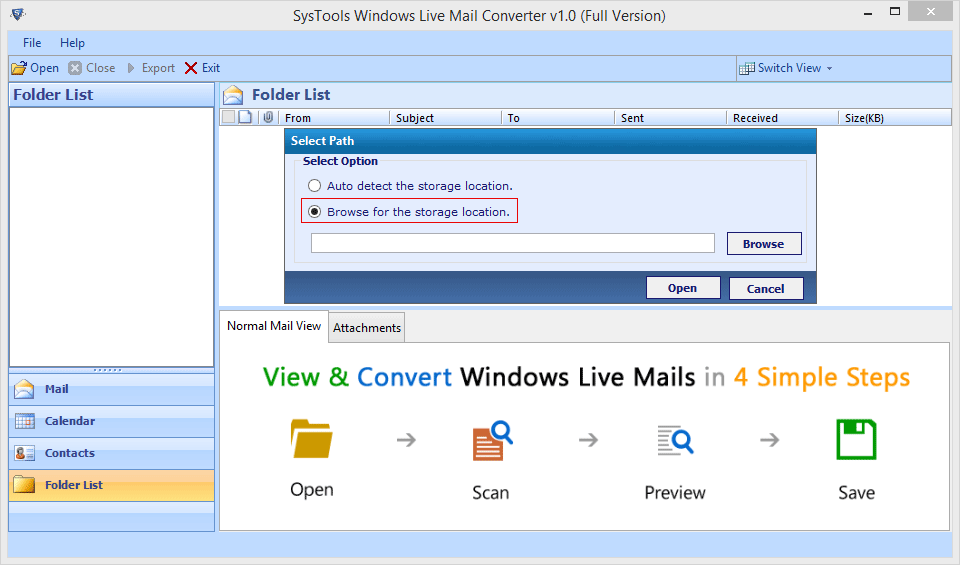
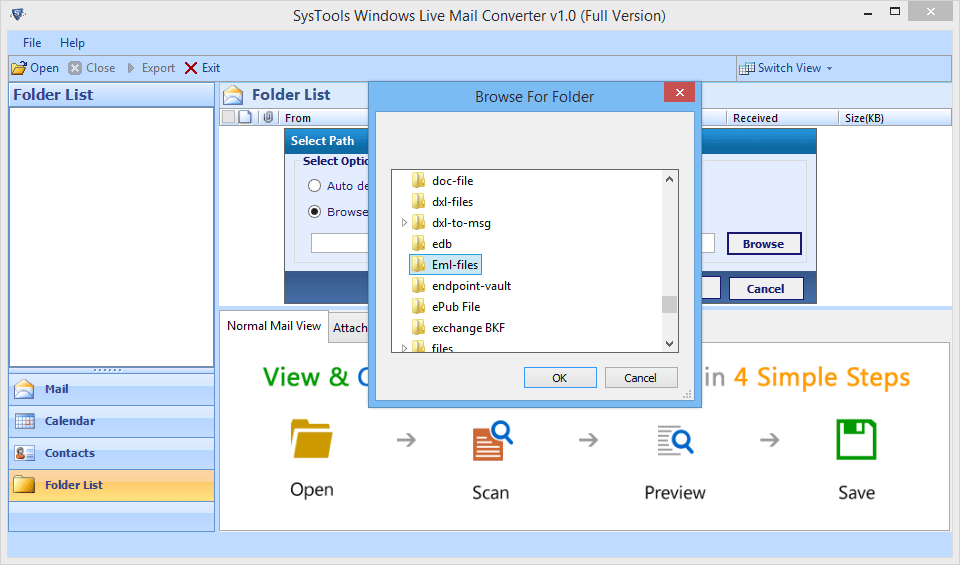
- Once you click on Browse button a window will be display to choose the file and then click on Ok button
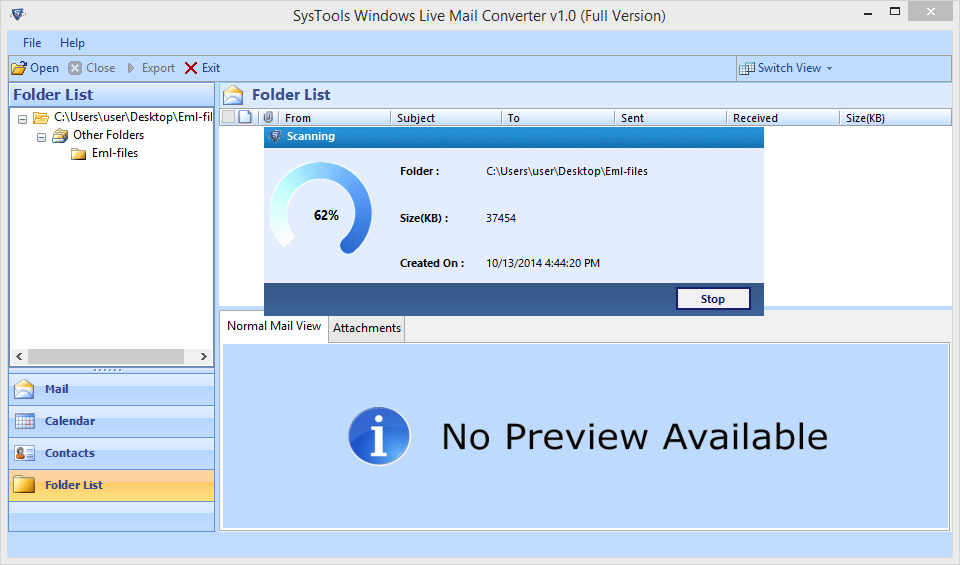
- As the files get loaded on the software process of Scanning will immediately starts like mention below screenshots.
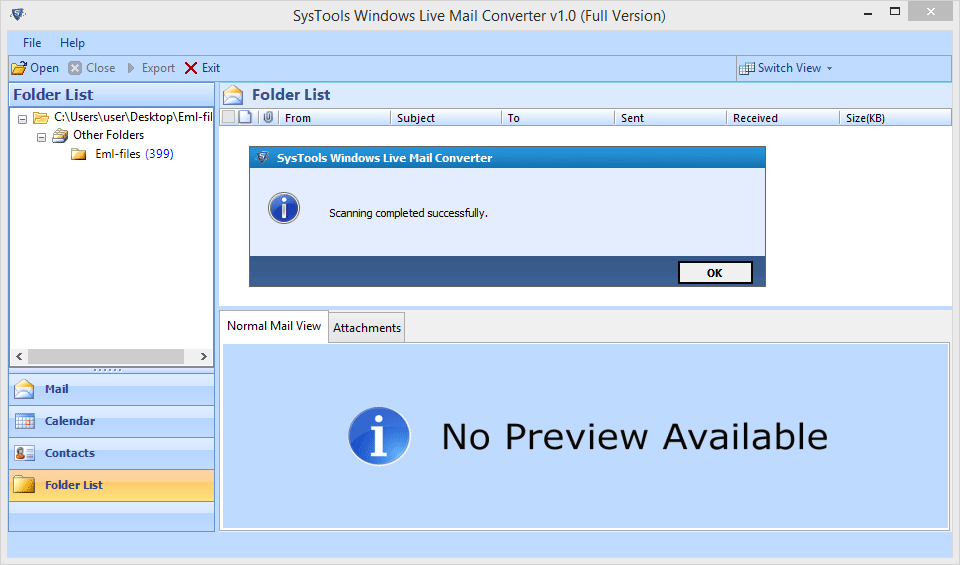
- As the process of Scanning will gets complete Notification window will pop up. Click OK to continue.
- Before conversion user can preview the Emails by selecting the option of Normal Mail View
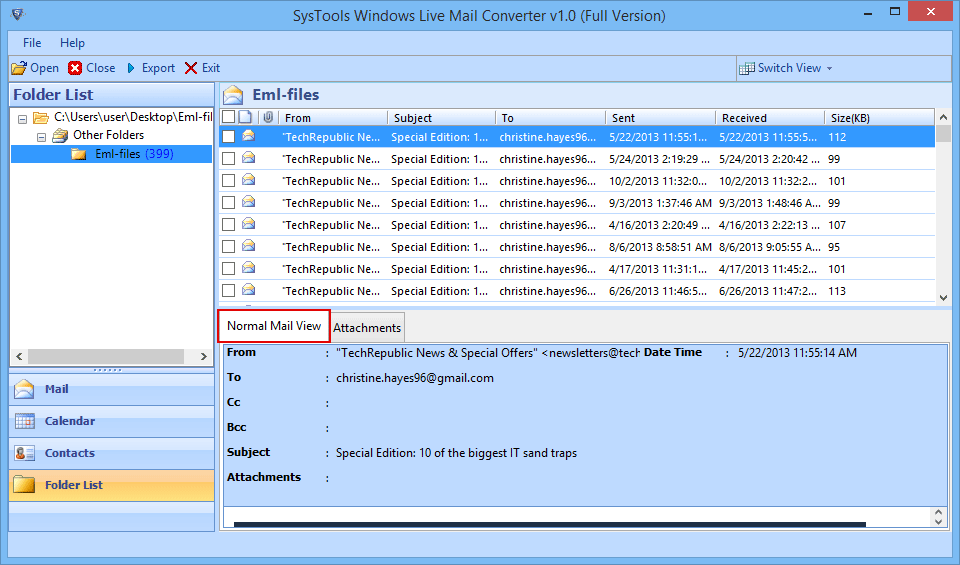
- To view Attachments of each Emails you can choose the Attachments option.
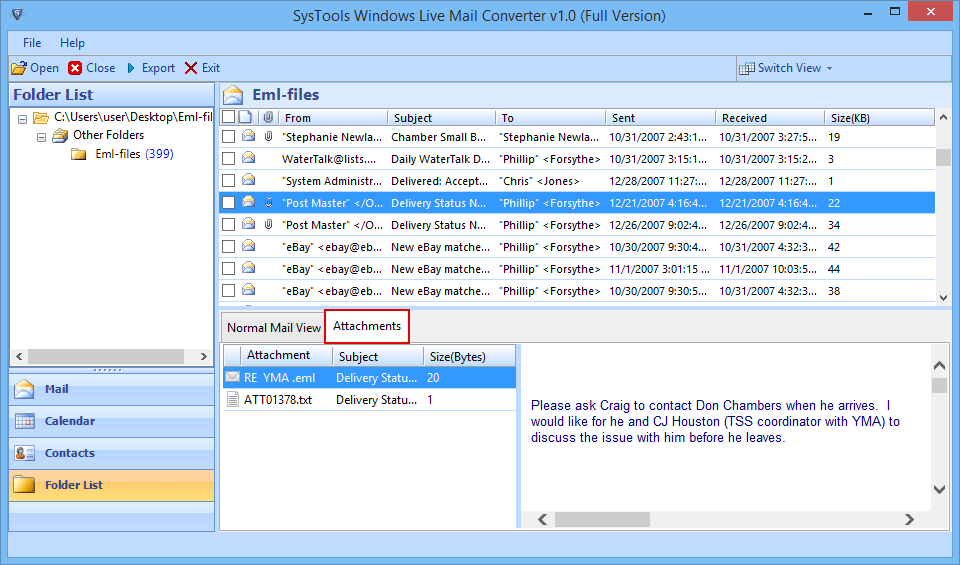
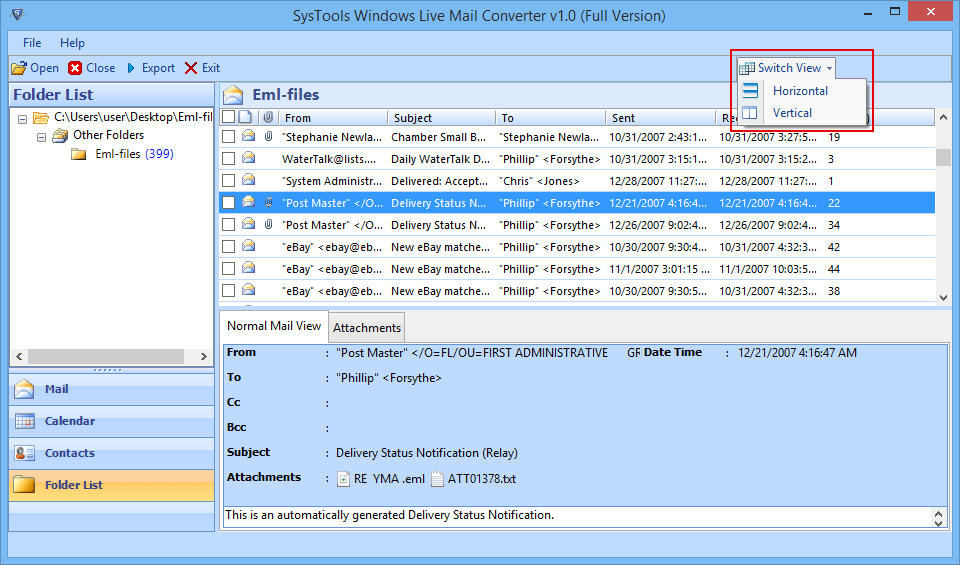
- There is a Switch View Option to that enables you to look the Emails or Attachments in Horizontal or Vertical manner.
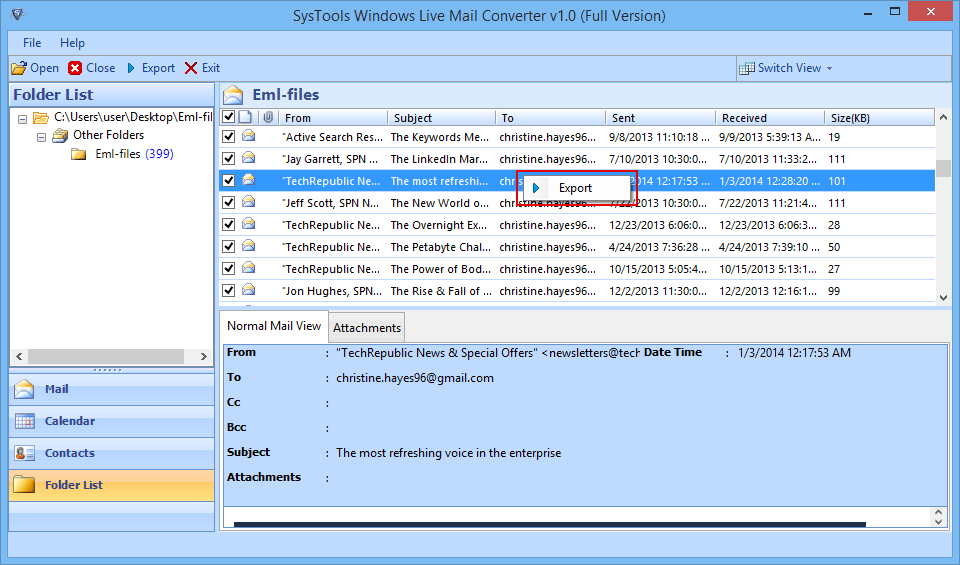
- If you are trying to export selected Emails then you can do so by check in the desired emails and then click on Export button.
- Now choose the file type of resultant Windows Live Mail files. You can choose any 3 of the option PST, MSG or EML. Mail Filter will allows you to exclude the data specified within Time interval.
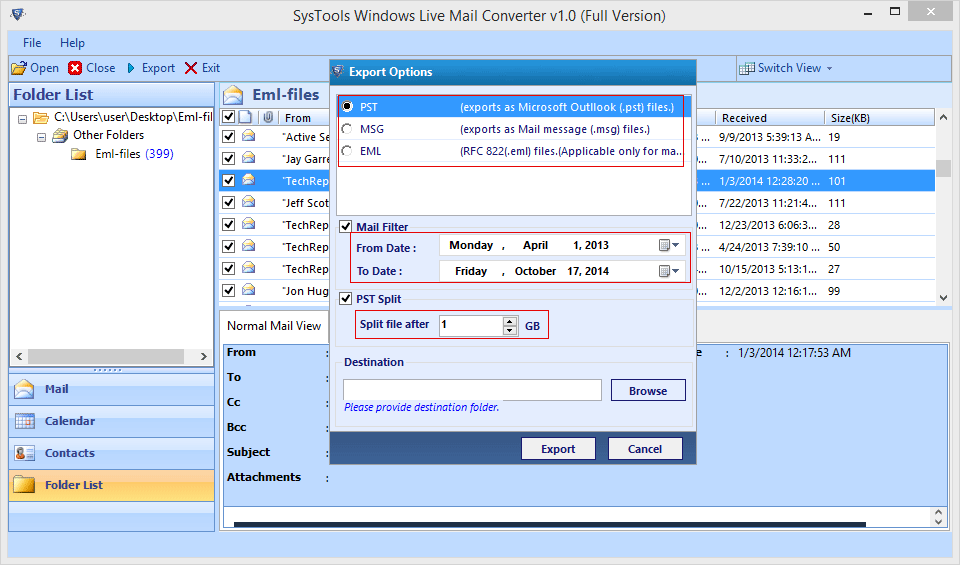
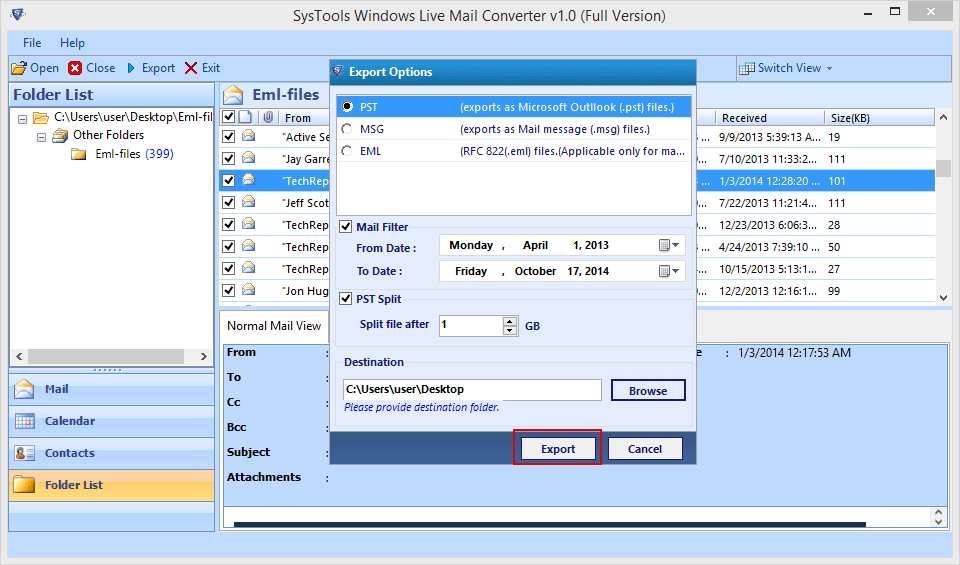
- Now choose the desired location to save the output and then finally choose the Export button to start the conversion.
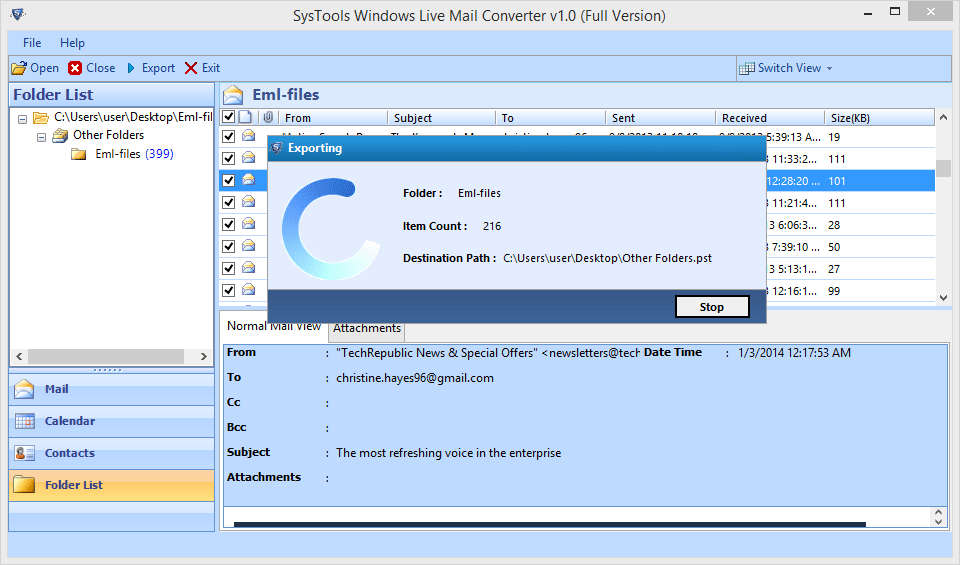
- Once you click on Export button Software will start converting the files and shows you live conversion report as display in the screenshot.
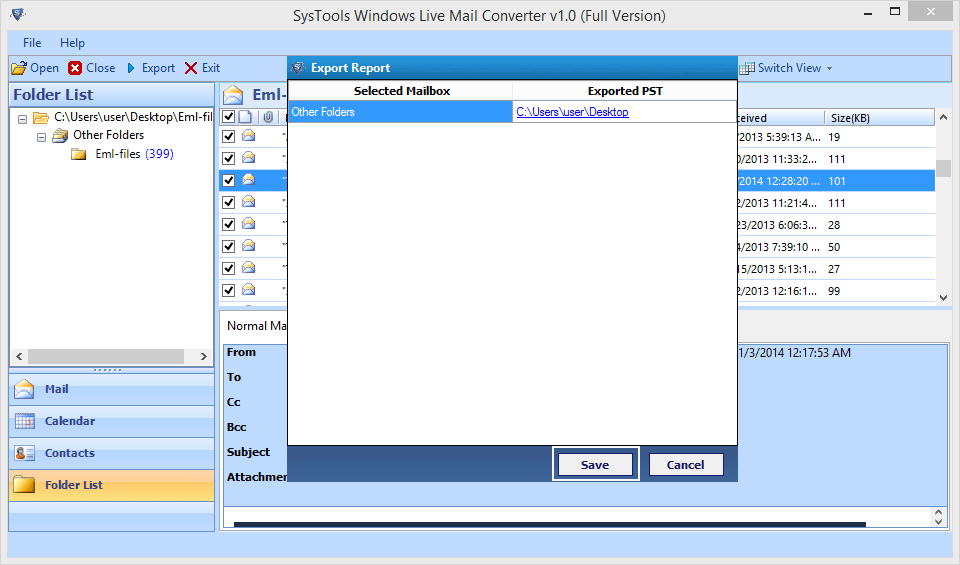
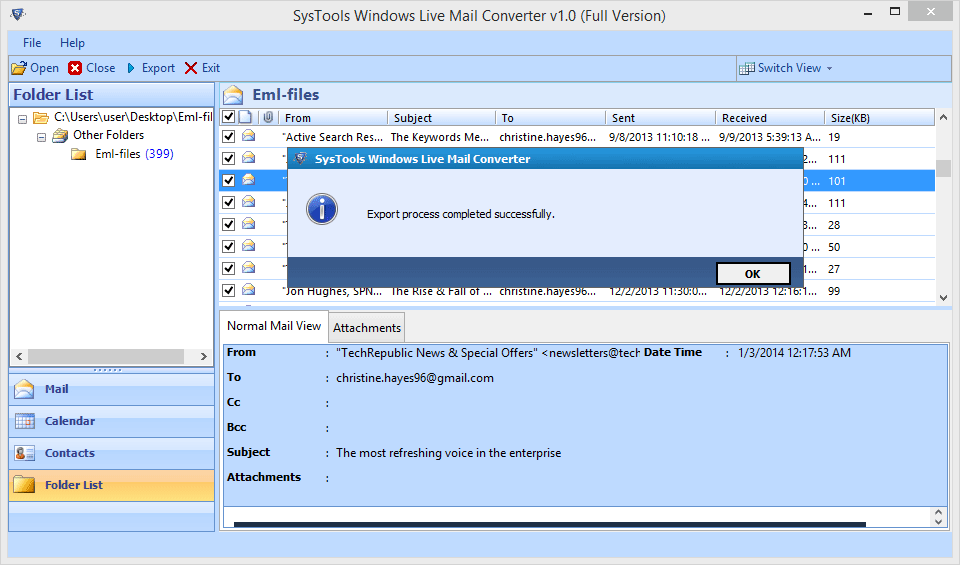
- As the Process of conversion gets completed an alert box will pop up with the message of completion.
- User can save the status report by clicking on the Save button and it’s done.
